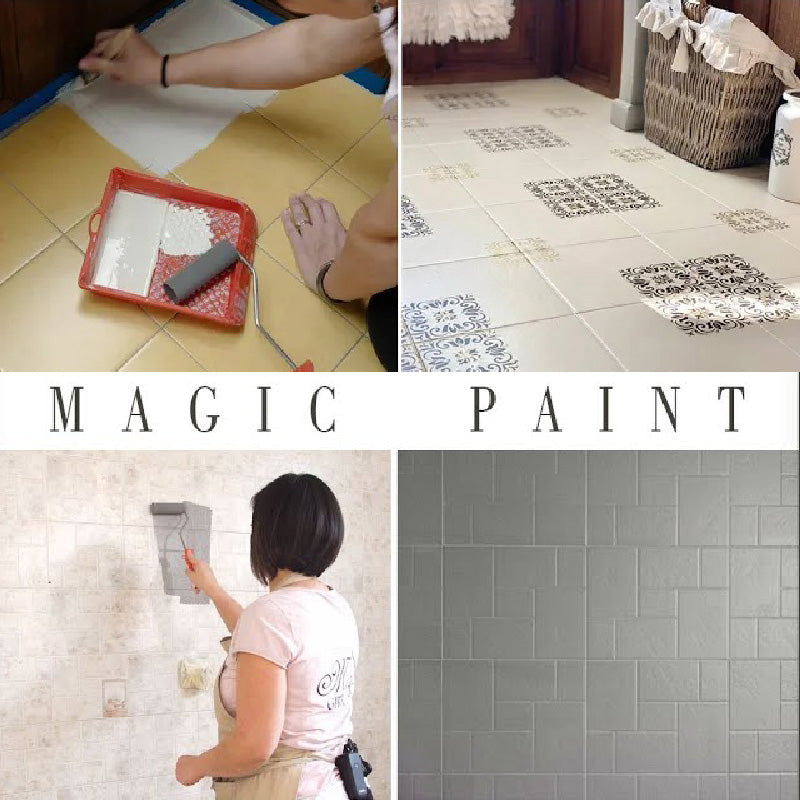
Floor Tile Restyling with Magic Paint
Magic Paint is an innovative paint with excellent adhesive power that allows it to firmly adhere to all surfaces without the need for primer or other additional products.
This makes it extremely practical and versatile for various types of renovation projects.
Additionally, it is an odorless paint, making it perfect for use in indoor environments, even in the most delicate ones like the kitchen or bathroom, without risking compromising air quality.
In this tutorial, we will guide you through the floor tile restyling process, step by step, to achieve a durable and high-quality result.
By following the described steps, you can renew your floor with a fresh and modern look.
Steps to Follow:
1. Surface Preparation:
Surface preparation is a fundamental step to ensure that the paint adheres properly and that the final result is perfect.
Start with a thorough cleaning of the surface to be treated.
Remove all traces of dirt, grease, or dust.
If there are silicone residues on the surface (such as around the bathtub, bidet, or toilet), it is important to remove them completely, as they could compromise the paint's adhesion.
2. Application of the First Coat of Magic Paint:
The first coat of Magic Paint should be applied pure, without dilution.
Before starting, mix the paint well to ensure an even distribution of color.
To apply the paint, you can use a microfiber roller of the size you prefer, or a brush like the model "Elisabeth Big", which offers good precision and coverage.
3. Application of the Second Coat of Magic Paint:
Also for the second coat, it is advisable to apply Magic Paint pure, without diluting it. However, if the surface is already well covered by the first coat and shows no transparency,
you can dilute the paint with up to 10% water to achieve a more fluid consistency.
4. Decoration (Optional):
If you want to add a personal touch to your floor, you can decorate it with a stencil.
Choose a stencil you like and a contrasting Magic Paint color.
To apply the stencil, use a size 12 dauber, which will allow you to achieve a precise and well-defined decoration.
You can find more details about the stencil technique in the video attached to the tutorial.
5. Application of the First Protective Coat:
Once the paint is dry, move on to the first protective coat.
Dilute the Satin, Glossy or Matte Protective with up to 10% water and apply it evenly with the roller or brush.
It is important to apply the protective with a crosswise motion to create total and even coverage.
Let the protective dry for at least 6-12 ore between one coat and the other.
During this time, make sure the environment is warm and dry, as humidity could compromise the drying and the final result.
Do not force drying: let the product dry naturally, as this step is crucial for long-lasting durability.
6. Application of the Second Coat of Protection:
Apply a second coat of protective product, always diluted with 10% water.
If the floor is subject to heavy wear (as happens in environments like kitchens or entrances), you can also apply a third coat of protection to ensure greater resistance.
7. Finish:
Once the paint and protective coating are completely dry, restore the silicone (where necessary), for example around the bathtub or sinks.
It is important to let the surface dry completely for 2-3 days before placing heavy objects on the freshly treated floor.
8. Maintenance:
To keep the floor in good condition, we recommend cleaning it using a mild detergent diluted with water.
After cleaning, dry with a soft cloth to avoid damaging the surface.
Avoid using overly abrasive or aggressive cleaners, which could compromise the floor's finish.
NOTE:
-
Avoid use on high-wear floors: This technique is not suitable for floors that undergo heavy daily stress. In these cases, it is advisable to opt for more durable materials.
-
Surfaces in contact with water: If the treated floor is in an environment like a shower or bathtub, where there is direct contact with water, it is necessary to apply the product Magic Water as additional protection. You can find all the information on how to use it at this link: CLICK HERE.
-
Experience level: If you are new to painting or lack good manual skills, we recommend doing tests on a less visible surface before proceeding. This project requires some experience to achieve the best results.
By carefully following these steps, you can give new life to your tiles with an elegant and durable finish that will last over time and maintain its fresh and appealing look.
FLOOR TILES
WALL TILES
Tips
If you want some ideas for your work or need help with the job you have to do, we recommend joining our Facebook group I LOVE MAGIC PAINT
![]()
You can make a post with photos or simply type the keyword you want related to your restyling in the SEARCH box.
Example: TILES many restyling options will appear regarding this.
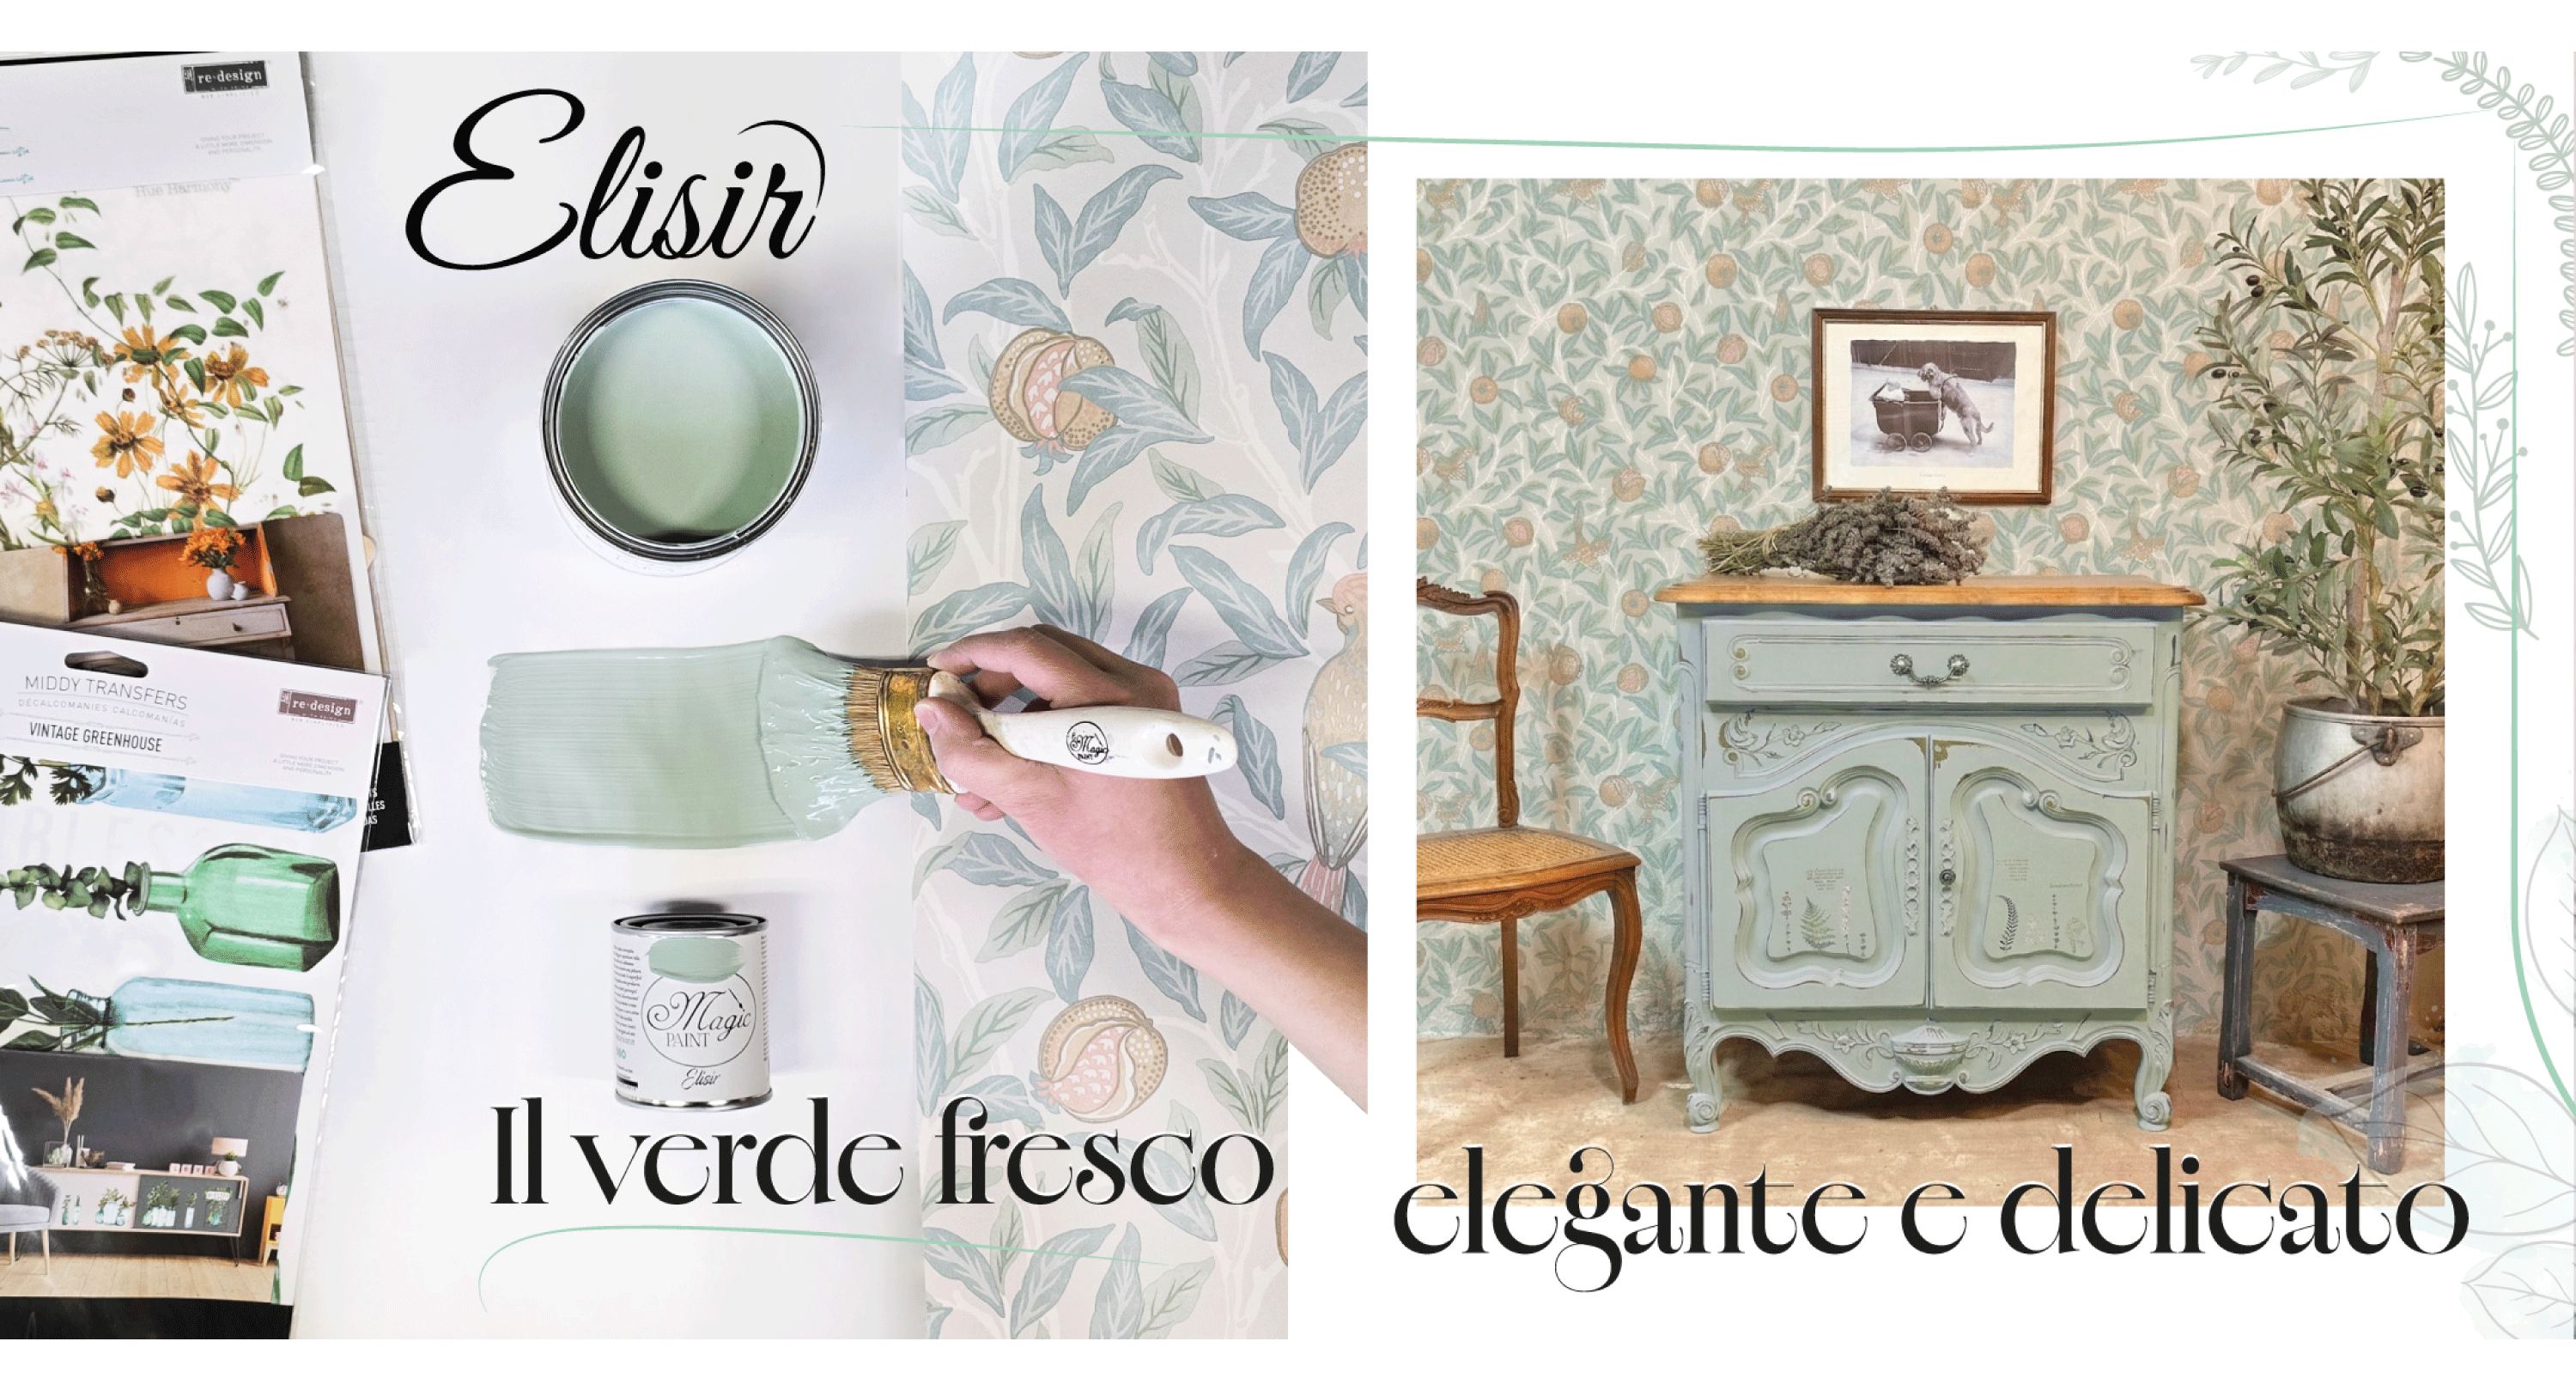
If you are thinking of giving new life to your furniture, Magic Paint is the right choice.
Easy to use, versatile, and odorless.
To discover and learn how to best use our products, you can follow all the tutorials by subscribing to our YouTube Channel: Elisa & Magic Paint
![]()
All our products are available online only on our sole authorized website Elisir Home or at our retailers. Not on Amazon.


Share: